Getting Started
Welcome to Isurus, a developer-first multi-VCS forge by Leafscale, LLC — Own Your Workflow. Protect Your Code. Isurus hosts Git, Mercurial, and Fossil repositories as first-class citizens, each with its own native tooling, alongside issues, pull requests, CI/CD pipelines, releases, and analytics. Leafscale runs it for you as a fully managed, dedicated tenant — your repositories stay private to your tenant and are never shared. This guide covers everything you need to get productive.
Account Setup
First Login
- Navigate to your Isurus instance and click Sign in.
- Log in with your credentials or use a configured SSO provider (Google, Microsoft, Okta, Keycloak, or SAML) if your administrator has enabled one.
- After your first login, visit Settings to configure your profile.
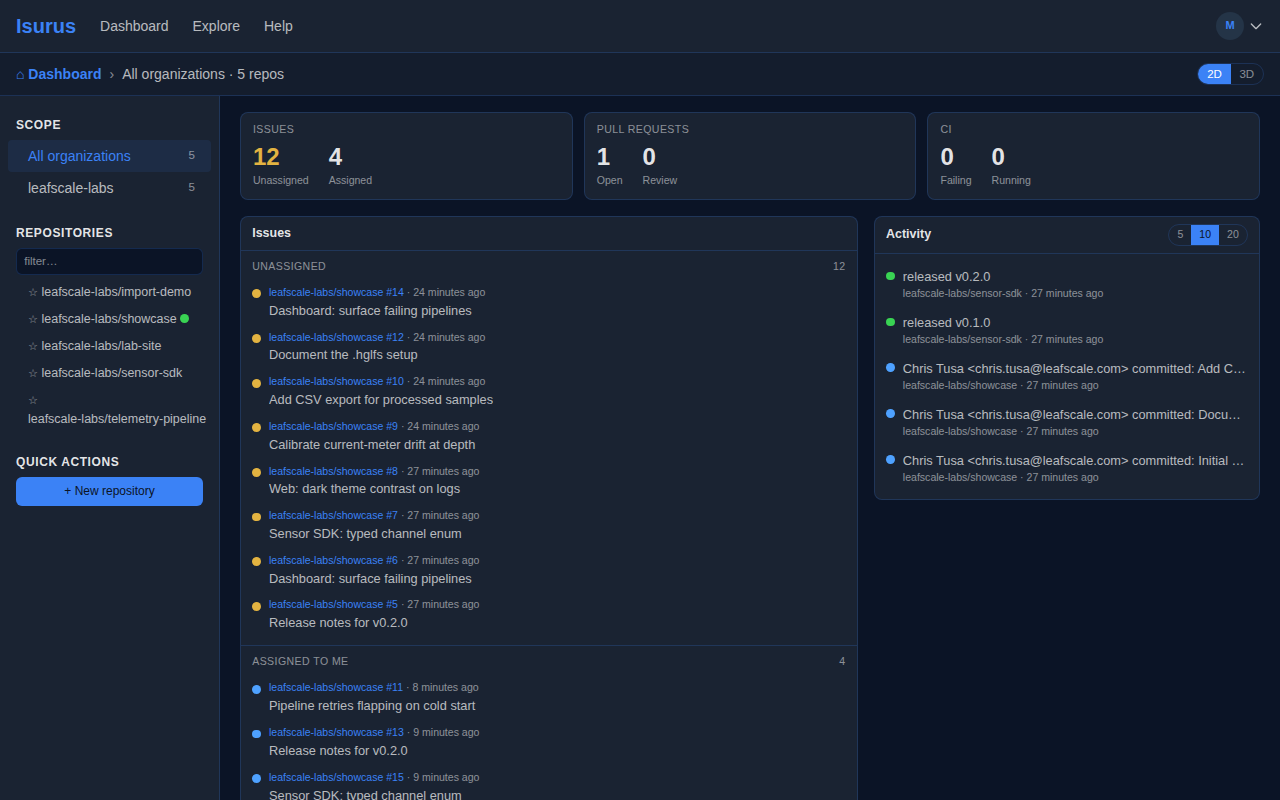
Once signed in, your Dashboard is your home base — it shows the organizations and repositories you belong to, and surfaces what needs your attention across issues, pull requests, and CI, alongside recent commits and releases:
Customize your dashboard
You can rearrange the dashboard widgets to match how you work:
- Collapse and Shade are always available on each widget (no unlock needed). Use them to tuck cards away or dim them for focus; the choice is saved with your layout.
- Click the padlock control (context bar, immediately left of the 2D/3D toggle) to unlock layout editing — drag, hide, and re-add widgets.
- Drag a widget by its handle to move it within a zone or into another zone (top, main column, side column, or bottom). You can also focus the handle and press Alt+↑ / Alt+↓ to reorder without a pointer.
- Use Hide (unlocked only) to remove a widget. Hidden widgets appear in the Add widget palette so you can bring them back.
- Click the padlock again when you are done. Changes save automatically. Reset default restores the original arrangement.
On the Repositories card, repositories are grouped by organization. Expand or collapse an org with the chevron (saved with your layout). Use the CI status chips (Failure, Success, Running, Queued, None) to multi-select which statuses appear; Clear resets the filter. Filter and collapse work without unlocking layout edit.
Layout edits pause live CI refresh on the page until you lock again. Edit mode is session-only; the next full page load starts locked with your saved layout. Collapse and shade stay usable while locked.
Profile Settings
Click your username in the top-right menu and select Settings. Your settings page uses a sidebar layout with the following sections:
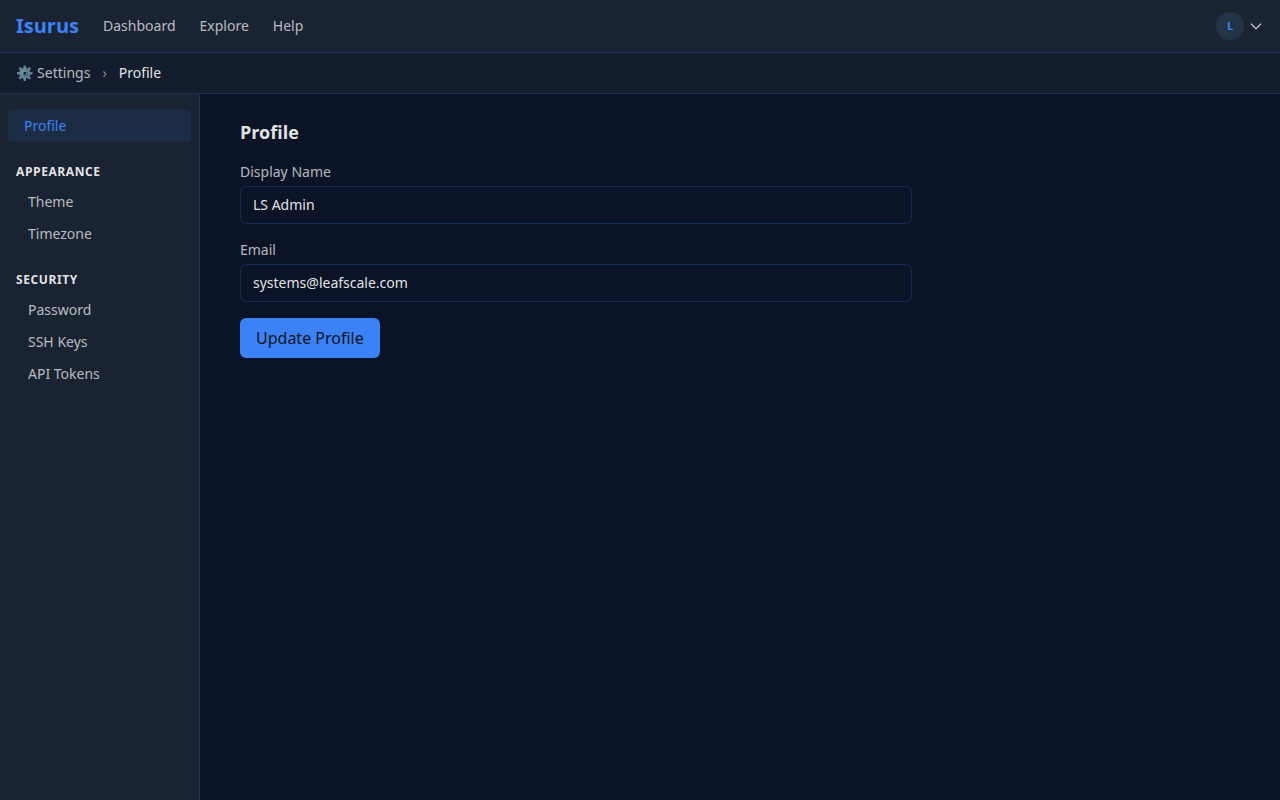
Profile — Set your display name (shown on commits, issues, and pull requests) and update your email address.
Appearance — Choose a color theme and set your timezone.
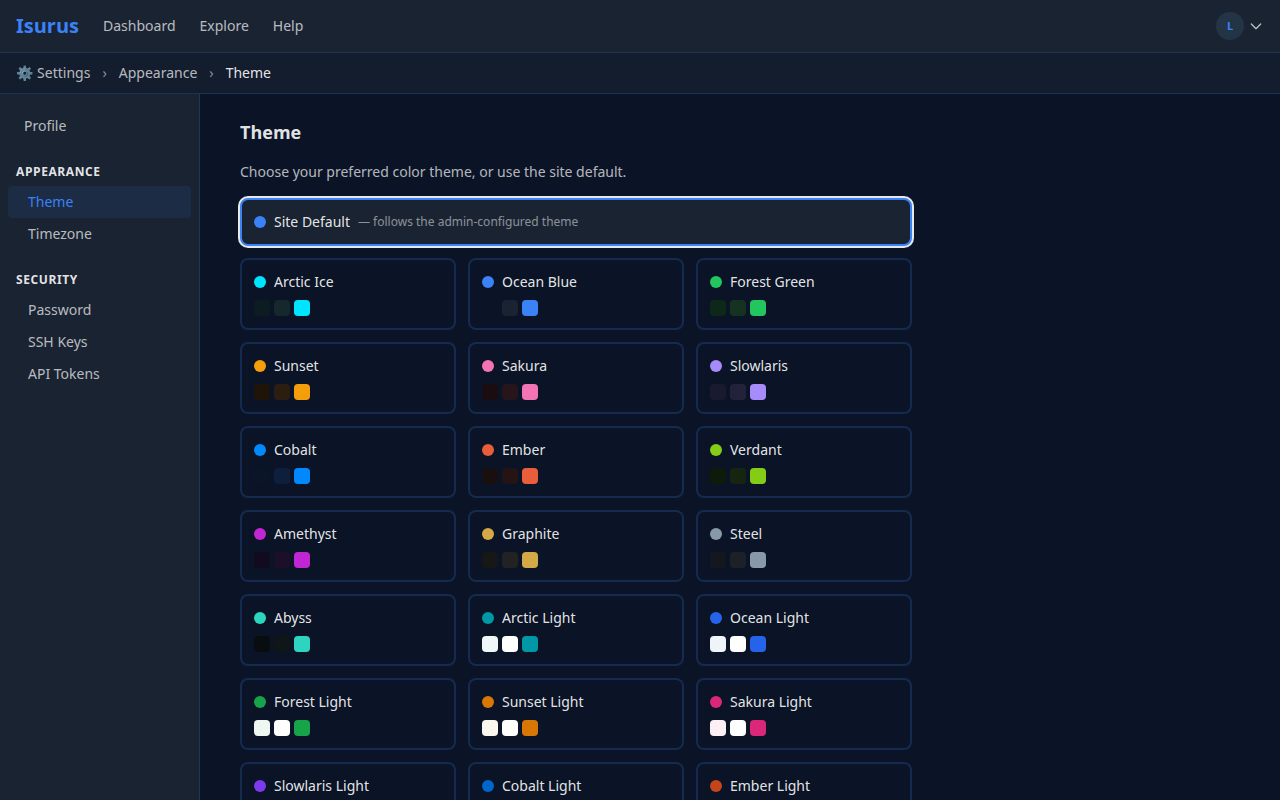
Isurus offers 26 color themes. The Site Default option follows whatever theme your administrator has configured, so your interface stays consistent with the rest of the instance unless you override it. Your timezone controls how dates and times are displayed throughout the application, including scheduled release publication.
Security — Change your password (local accounts only), manage SSH keys, and create API tokens.
If you've forgotten your password, click Forgot your password? on the sign-in page (or go to /forgot-password directly). Enter your email address and Isurus sends a reset link valid for 1 hour. The reset flow works only for local accounts — SSO-provisioned users recover through their identity provider.
Licensing
Isurus requires a valid license to operate. Your administrator configures the license during initial setup. If you see an "Unlicensed" page, contact your administrator. Resource limits (repositories, users, storage, CI minutes) are determined by your organization's license plan.
Organizations
Organizations group repositories and team members together.
Creating an Organization
- Click + New in the navigation bar and select New Organization.
- Enter an organization name (lowercase, letters, numbers, and hyphens only).
- Optionally add a description.
- Click Create Organization.
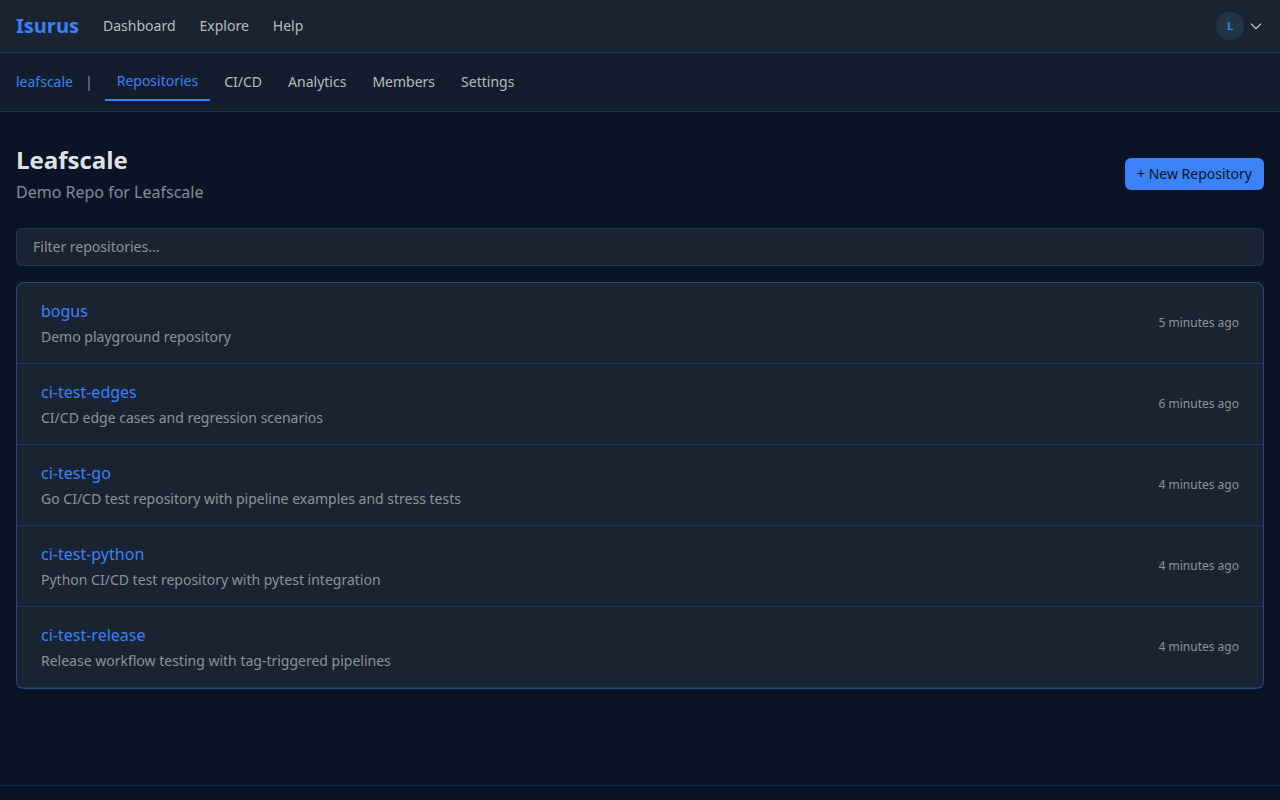
Organization Roles
| Role | Permissions |
|---|---|
| Owner | Full access: manage members, settings, and all repositories |
| Member | Read/write access to organization repositories |
Managing Members
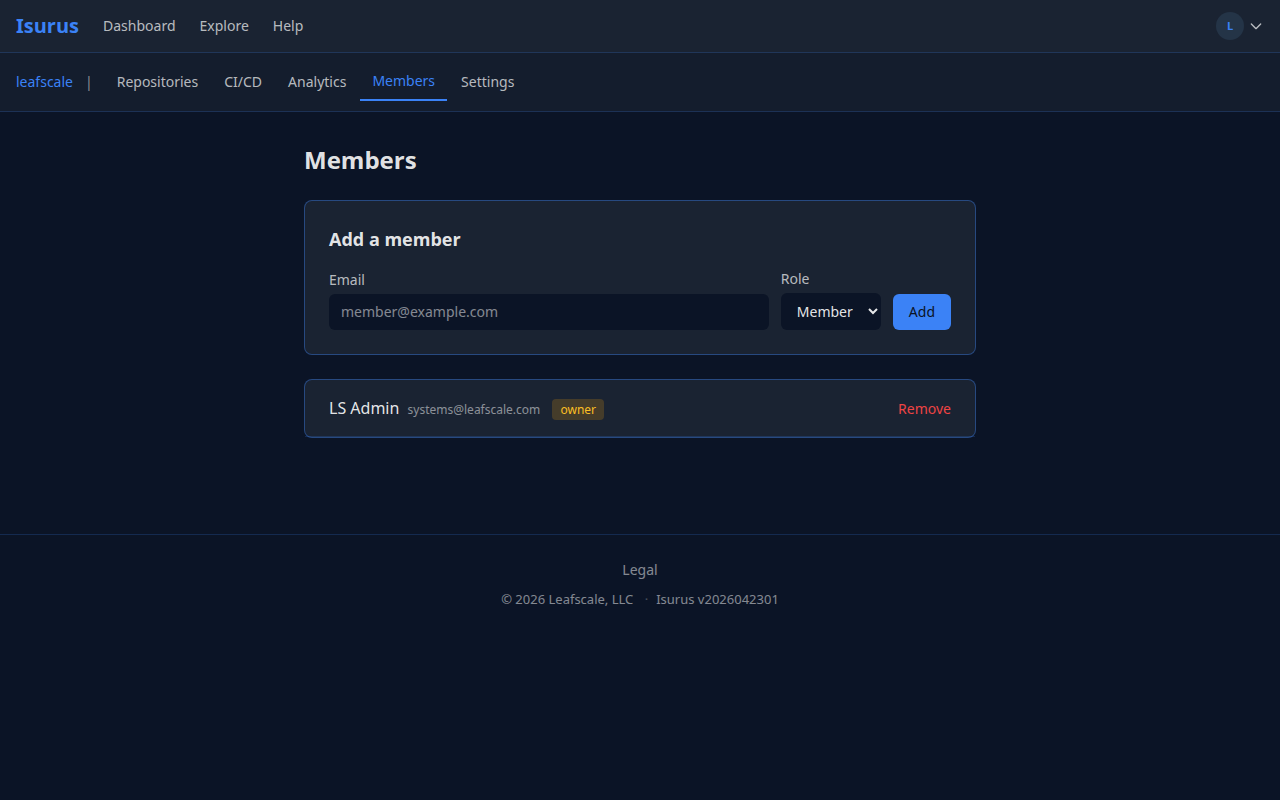
- Navigate to your organization page.
- Click Members in the sidebar.
- Use Add Member to invite users by username.
- Owners can remove members or change roles.
Repositories
Creating a Repository
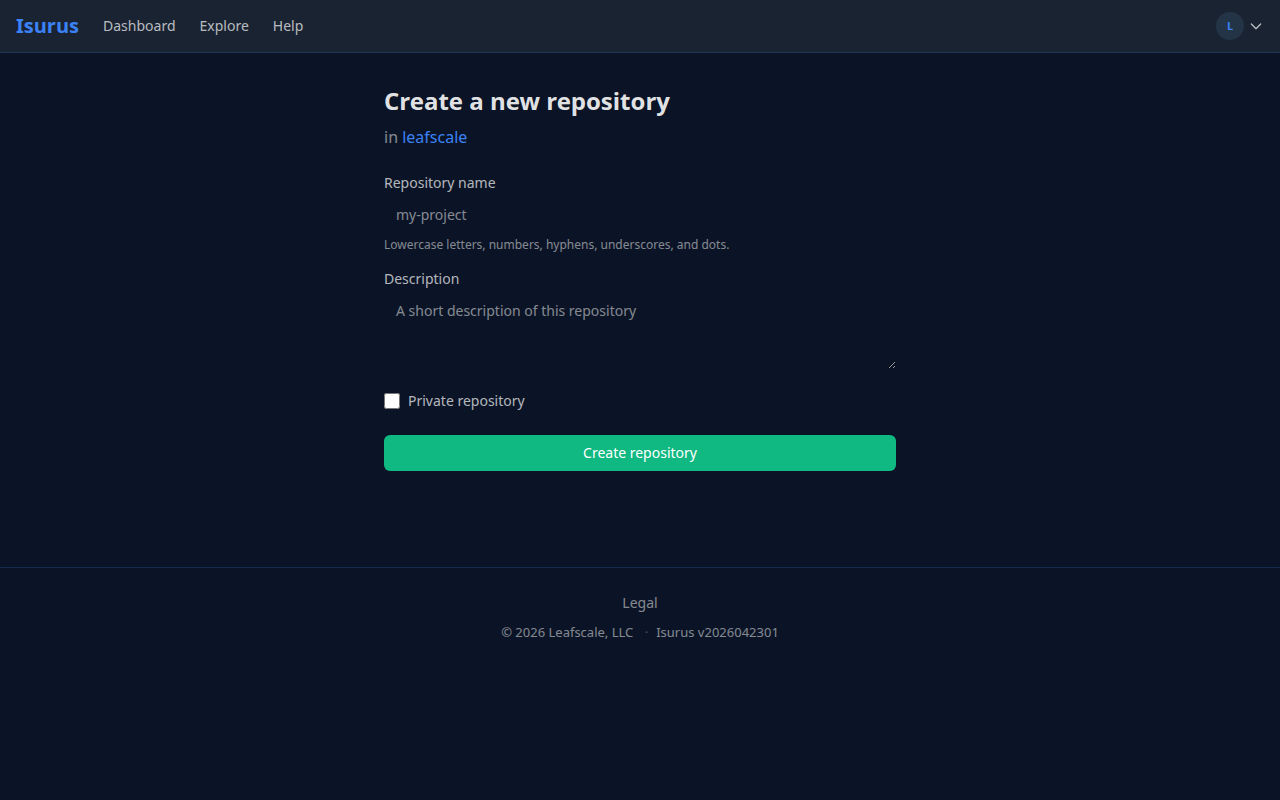
- Navigate to the organization where you want to create the repository.
- Click New Repository.
- Enter a name (lowercase, letters, numbers, hyphens, and dots).
- Choose the VCS type — Mercurial, Git, or Fossil. This is fixed for the life of the repository and determines which client (
hg,git, orfossil) you use to clone and push, and which native terms the UI shows (Mercurial bookmarks/changesets, Git branches/commits, Fossil check-ins/branches). Git repositories also transparently serve Jujutsu (jj), since a jj repo is a Git repo on the server side. - Add an optional description.
- Choose Public (visible to everyone) or Private (visible to org members only).
- Click Create Repository.
Note: A new Mercurial repository can take a few seconds to become reachable over HTTP. If a clone or push over HTTP returns
404right after you create the repository, wait a moment and try again. SSH access, Git and Fossil repositories are available immediately.
Every repository page shows a Clone widget with the exact command and URL for that repository's VCS — the examples below are the general shapes.
Browsing a Repository
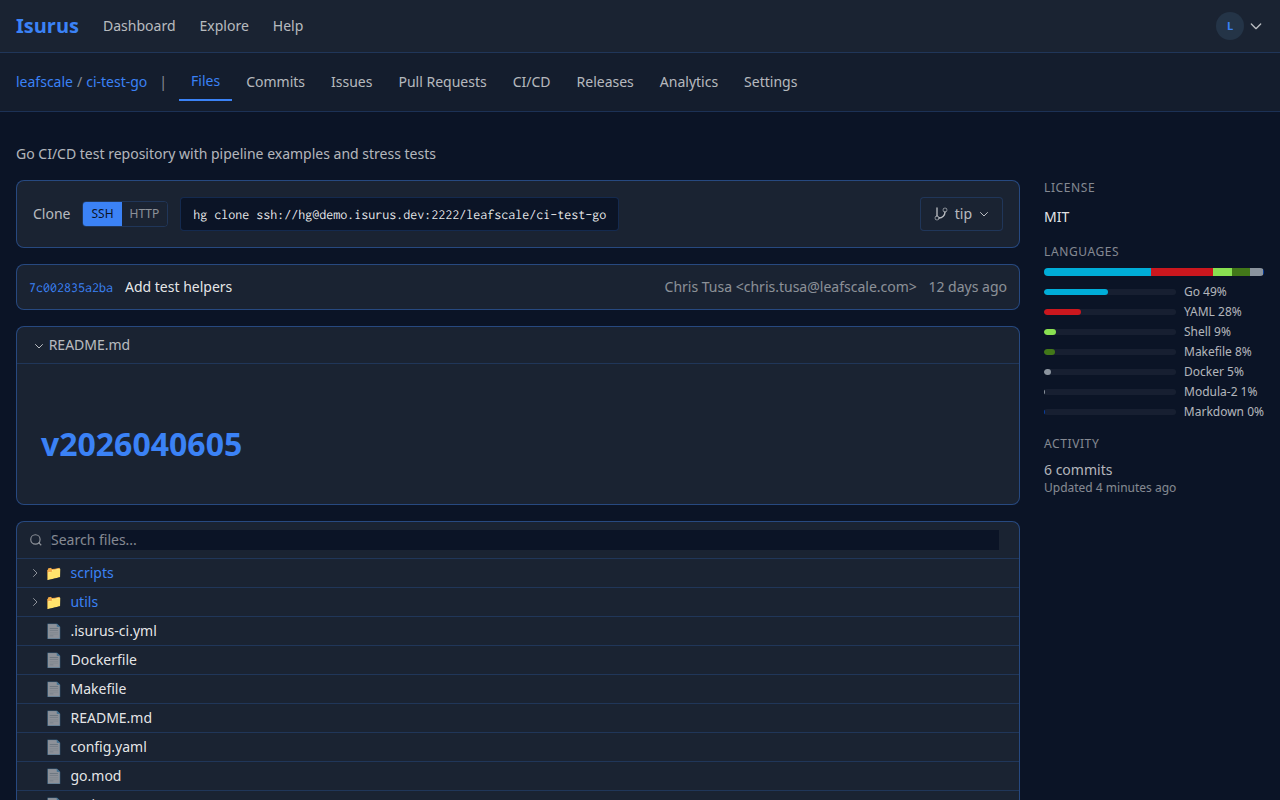
The repository page shows the README by default with a collapsible file tree on the left. The right sidebar displays metadata about the repository including Languages, Topics, License, and recent Activity.
Use the file search to quickly locate files by name, or browse the tree view to explore the directory structure.
Repository Settings
Repository owners can access settings via the Settings tab. Settings are organized in a sidebar with the following groups:
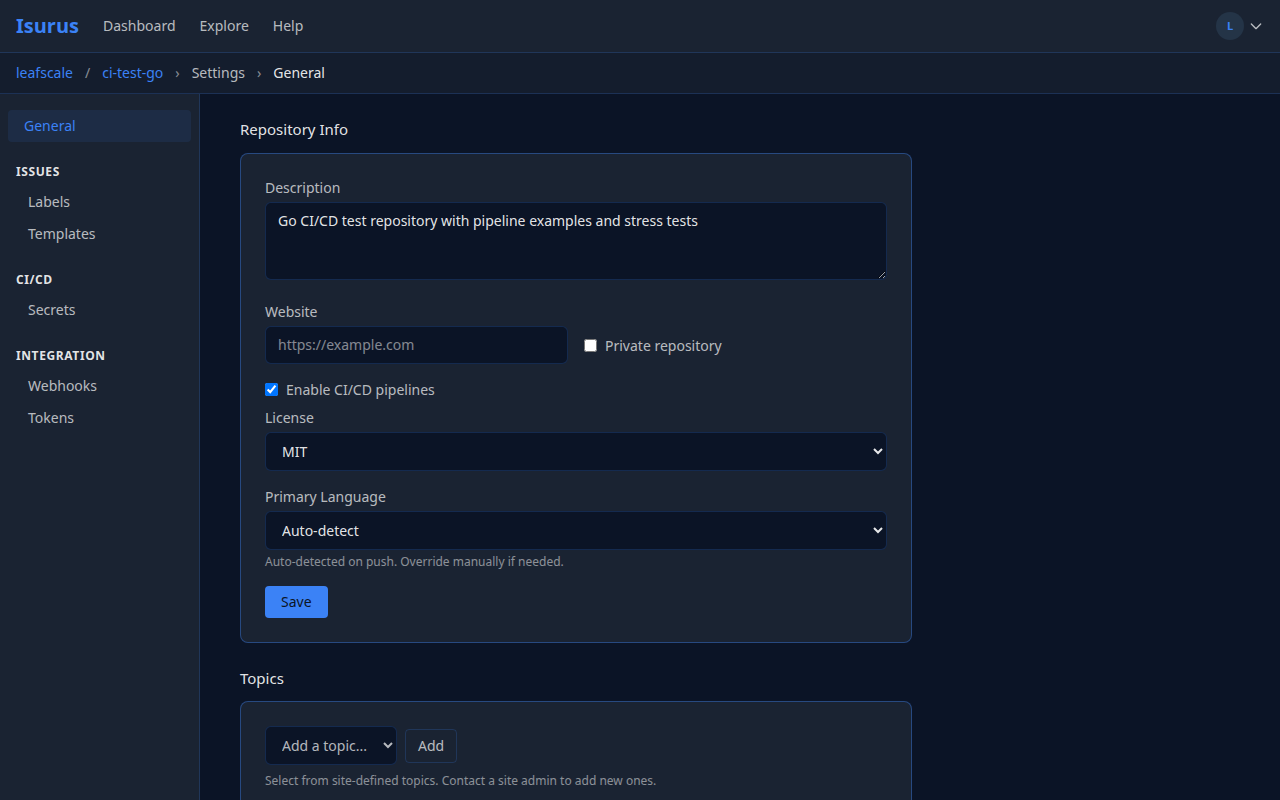
- General — Update the description, toggle visibility between public and private, and access the danger zone (delete repository).
- Issues > Labels — Manage repository-level issue labels.
- Issues > Templates — Create templates for bug reports, features, and more.
- CI/CD > Secrets — Manage pipeline secrets for CI builds.
- Integration > Webhooks — Configure event notifications for external services.
- Integration > Tokens — Create repo-scoped API tokens.
Exploring Repositories
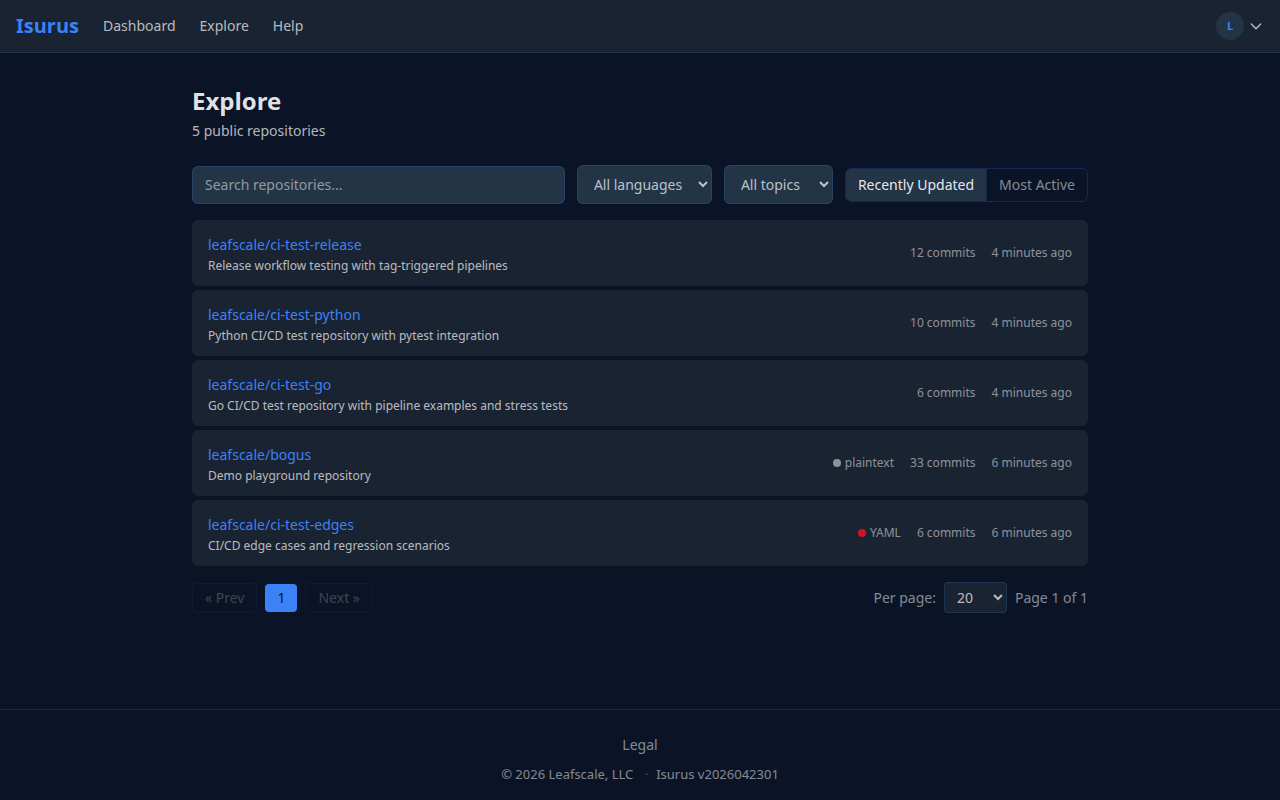
The Explore page lets you discover public repositories across the instance. Use the Language and Topic filter dropdowns to narrow results by programming language or subject area.
SSH Keys
SSH keys provide secure, password-free authentication for pushing and pulling.
Generating an ED25519 Key
ssh-keygen -t ed25519 -C "your@email.com"
When prompted, accept the default file location (~/.ssh/id_ed25519) and optionally set a passphrase.
Adding Your Key to Isurus
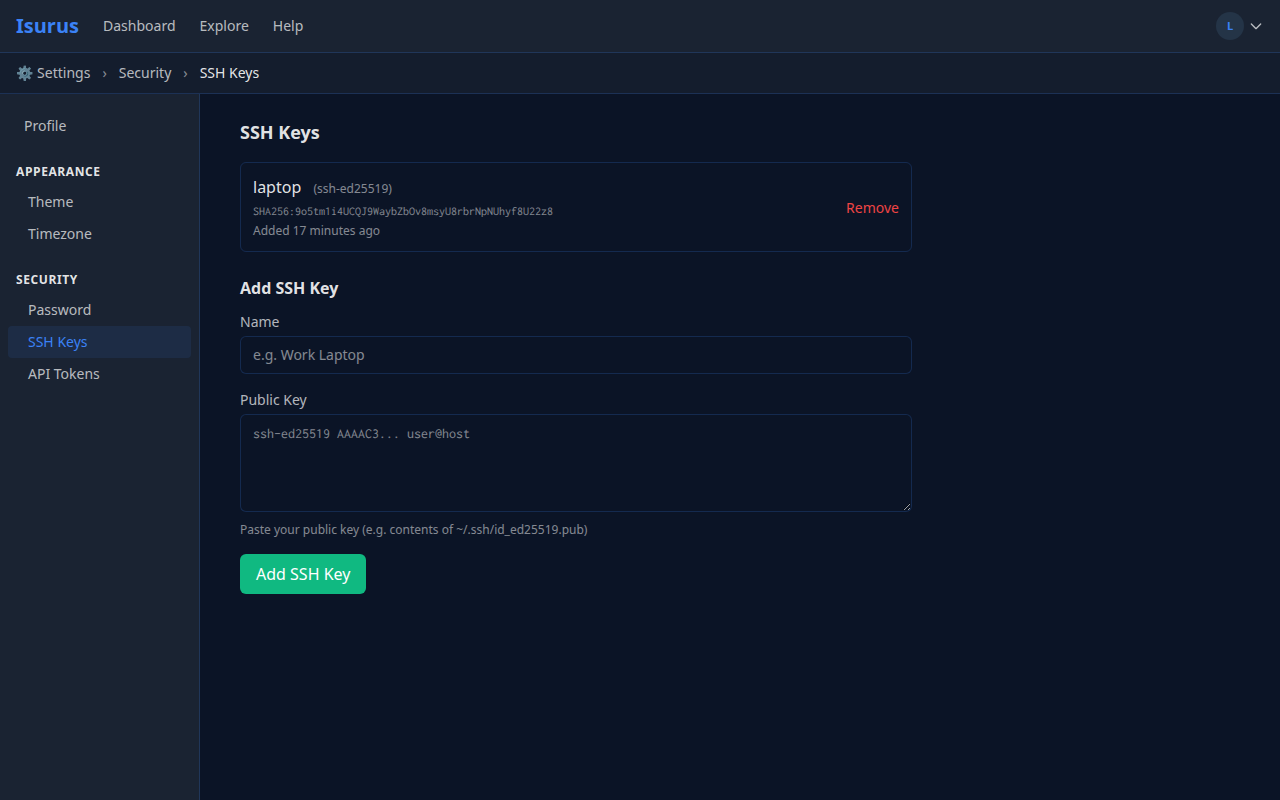
- Copy your public key:
cat ~/.ssh/id_ed25519.pub - Go to Settings and click SSH Keys under the Security section in the sidebar.
- Paste the key into the Key field.
- Give it a descriptive name (e.g., "Work Laptop").
- Click Add SSH Key.
Testing Your Connection
ssh -T your-isurus-host
You should see a message confirming successful authentication.
Cloning Repositories
Use the client that matches the repository's VCS type. Each repository page's Clone widget shows the exact URL — copy it from there. The examples below use your-isurus-instance as the host and org/repo as the path.
Authenticating over HTTP: supply your username and a password or API token (put the token where the password goes, e.g.
https://<user>:<isurus_token>@host/org/repo, or--httpauth <user>:<token>for Fossil). Create a token under Settings → Tokens (personal) or a repository's Settings → Integration → Tokens (repo-scoped); scope itrepo:readto clone/pull andrepo:writeto push. SSO (SAML/OIDC) users have no account password and must authenticate with a token (or use SSH keys for Git/Mercurial).
Mercurial
# HTTP — prompts for username and password (or API token)
hg clone https://your-isurus-instance/org/repo

# SSH — requires an SSH key added to your account
hg clone ssh://hg@your-isurus-instance:2222/org/repo
Git
# HTTP — prompts for username and password (or API token)
git clone https://your-isurus-instance/org/repo

# SSH — requires an SSH key added to your account
git clone ssh://hg@your-isurus-instance:2222/org/repo
The
hg@in the SSH URL is just the SSH login name; Isurus authenticates by SSH key, not by that name, so any username works. Copy the exact URL (host, port, and login) from the repository's Clone widget.
Fossil
Fossil is served over both HTTP and SSH. Clone into a single-file .fossil repository:
# HTTP — public repository
fossil clone https://your-isurus-instance/org/repo repo.fossil

# HTTP — private repository, authenticate with your username/token
fossil clone --httpauth <user>:<token> https://your-isurus-instance/org/repo repo.fossil

# SSH — authenticate with an SSH key (no --httpauth)
fossil clone ssh://hg@your-isurus-instance:2222/org/repo repo.fossil
Then open a working check-out with fossil open repo.fossil. Over SSH, Isurus authenticates by SSH key (the hg@ login name is not significant). See the Fossil Cheat Sheet for the full workflow.
HTTP vs SSH (Git & Mercurial)
| Method | Pros | Cons |
|---|---|---|
| SSH | No password prompts, secure | Requires SSH key setup |
| HTTP | Works everywhere, simple setup | Requires credential storage or repeated entry |
What's Next?
Now that you're set up, explore these guides:
- Issue Tracker Guide — Track bugs, features, and tasks with labels, templates, and cross-referencing.
- Pull Requests — Propose changes, review code, and merge with issue auto-close.
- CI/CD Guide — Set up automated pipelines and publish releases with
.isurus-ci.yml. - Isurus CLI (isu) — Install the command-line client for issues, PRs, CI, and releases.
- Migrating from Git — Host Git as-is, or convert to Mercurial; command mapping and workflow translation.
- Converting a Repository's VCS — Switch Git, Mercurial, or Fossil in place on an existing repository.
- Hosting Git & Fossil — Create and work with Git and Fossil repositories on Isurus.
- Mercurial Cheat Sheet — Quick command reference for Mercurial.
- Git Cheat Sheet — Quick command reference for Git.
- Fossil Cheat Sheet — Quick command reference for Fossil.
- REST API Reference — Integrate with Isurus programmatically.